

Top 5 Tips: The Occupancy Module
Welcome back to another set of Top 5 Tips for Success. This time it’s all about the powerful Occupancy Module.
1) Always Begin with the Settings Section
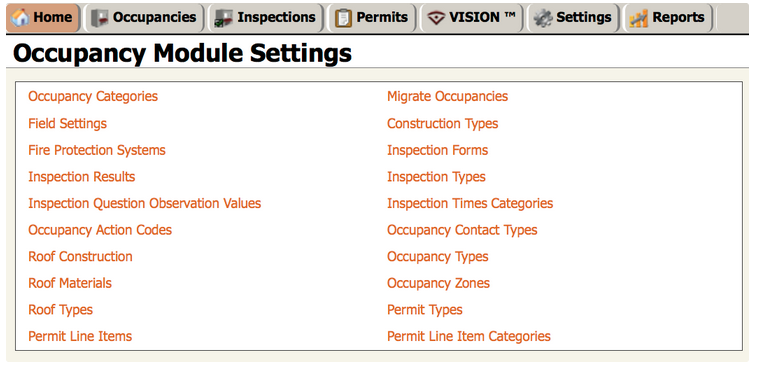
This one may seem obvious, but it is commonly overlooked when you’re eager to get started using a new module in Emergency Reporting. I cannot emphasize this tip enough. By reading our knowledge base articles, viewing the many training videos we offer, and taking your time in the Settings section of each module, you’ll greatly enhance your experience in setting up your account. The Occupancy Module has one of the more comprehensive Settings sections in our system. This makes the Occupancy Module one of the most versatile and configurable in the system. Here’s a screen shot of the Settings Page:
2) Follow-Up Inspections
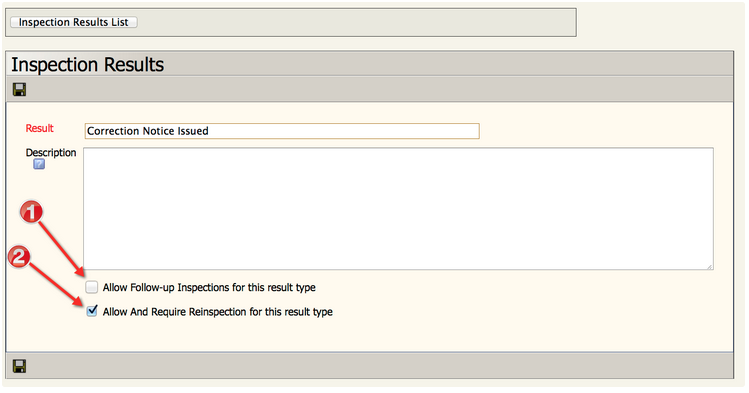
This little gem allows you to either require or allow a follow-up inspection based on the overall result of the inspection. For each Inspection Result, you can select either
1) “Allow Follow-up Inspections for this result type†or
2) “Allow And Require Reinspection for this result typeâ€.
The only difference between these two options is that Option 2 will require the inspector to manually schedule a follow-up inspection before completing the initial inspection. The best part about this feature occurs when you go to do the follow-up inspection: All of the initial violations and associated entries appear on the new inspection form so the inspector knows exactly what needs to be corrected.
3) Inspection Question Observation Values
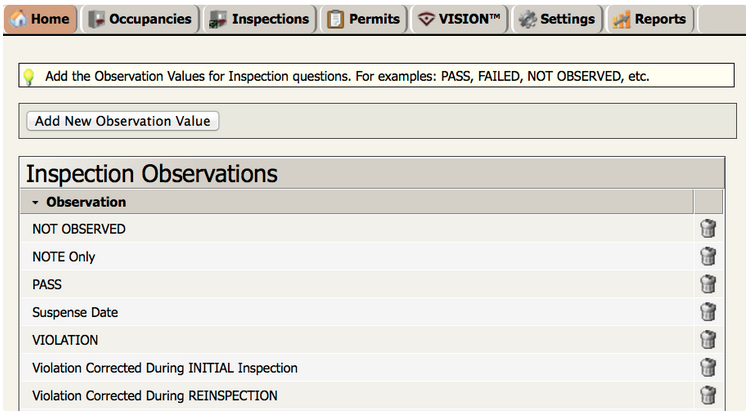
The reason this component of the Occupancy Module Settings is so important is that is helps you control what is printed/displayed in the Inspection Report. Be sure to give yourself the flexibility to print multiple observation values in order to deliver a comprehensive, but not overwhelming, report to the customer. Here’s an example for your consideration:
4) Inspection Types – Default Activity Code
Experienced users of Emergency Reporting know that three activities automatically populate the Daily Log:
- Completed Incidents,
- Completed Training Classes, and
- Completed Inspections.
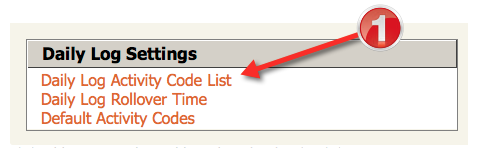
Each Inspection Type can have its own Activity Code if desired by the Agency. To set this up correctly, follow these steps:
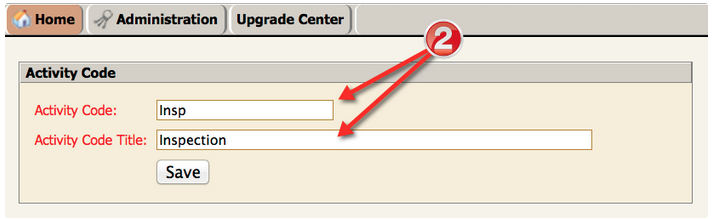
- Navigate to the Administration Module, then click on Daily Log Activity Code List.
- Click Add Activity Code to add a code and code title. Click Save.
- Navigate to the Occupancy Module, then click the Settings button.
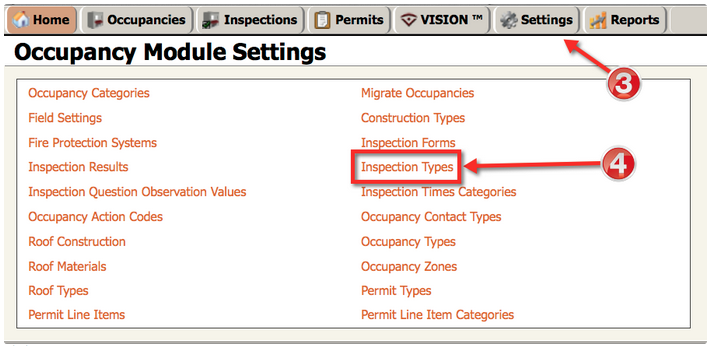
- Click on Inspection Types.
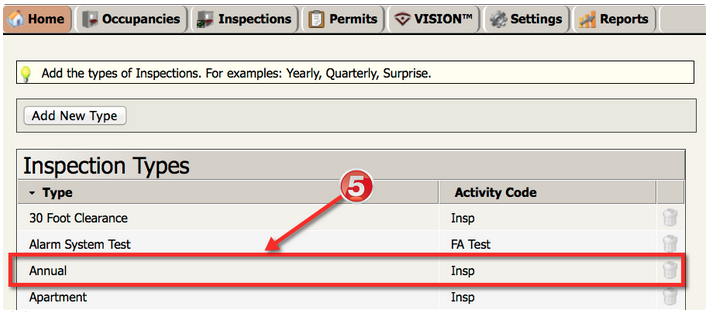
- Click on an existing Inspection Type.
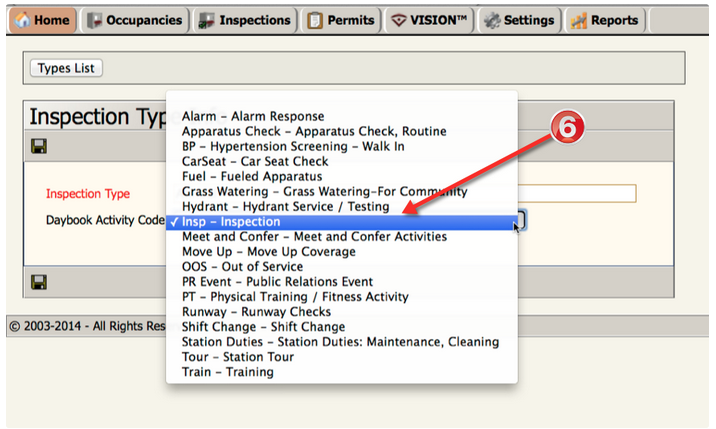
- Select a Daybook Activity Code you from the dropdown list. Click the Save icon.
Excellent! Now each time this Inspection Type is completed, the selected Daybook Activity will automatically populate in the Daily Log.
5) Sharing Inspection Forms
By using Agency Friends, you can share Inspection Forms with other Emergency Reporting users within your state. Follow these links to learn how to use this time-saving feature:
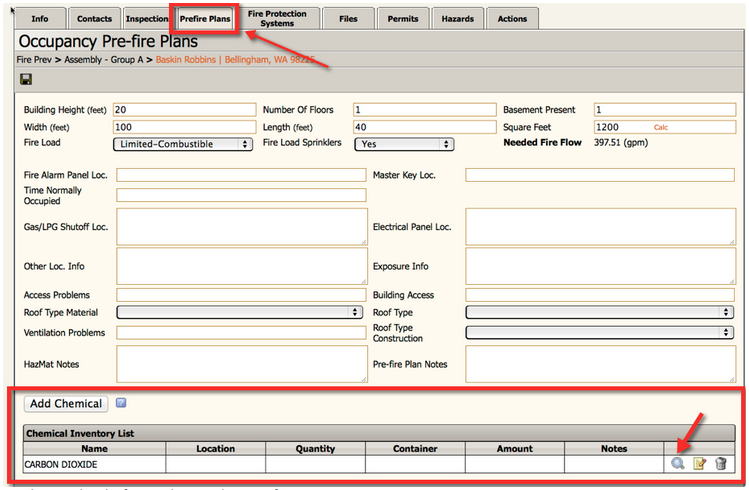
Bonus tip
Did you know you can add chemicals to an occupancy that will directly link to CAMEO with just one click? Once you’re in an occupancy, click on the Prefire Plans tab. Scroll down to the bottom of the page. There you’ll see the ability to add a chemical. Once a chemical is added, you can click on the magnifying glass to open a new tab that will take you directly to the CAMEO data for that chemical. Pretty cool!
As always, thanks for reading and stay safe!
